Sunday, 17 April 2016

Grass Texture

 Making the grass texture was simply done so in Photoshop for my 3D work. I first made a light green background.


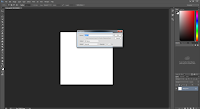
I then added noise from the filter tab by 25% and the Distribution of Gaussian and checked Monochromatic.


After that, I went to the Stylize > Wind in the filter tab. And then I made the method to stagger, and the direction from the right.


I rotated the image by 90 degrees and applied wind, repeating the process another two times.


I then applied a brownish layer on top with multiply and 60% opacity. And another darker layer on top, also multiplied by 20% opacity.


With that, I applied my texture to my finished model of the base surface.


Bark Texture

Following up my 3D work, I made some bark texture to go with the trees in my arena. This was entirely done in Photoshop. 

Firstly, I rendered clouds from the filter tab in black and white. Multiple times can be applied, but I had only done so once.


After that, I then rendered fibers. There, I made sure the Variance was 16 by 4 Strength before hitting OK.


I then selected the Liquify filter and started making multiple "knots" into the texture.


In the Hue/Saturation tab, I lowered the lightness by -80, Saturation by 42, and Hue by 19 to give me that brown foreground.


On top of that, I added another layer of lighter brown under Overlay, and 30% opacity. I then saved the file as a jpg.


Saturday, 16 April 2016

3D Statue Model - Final

Lastly, for my 3D Model Statue, I again used reference from my work before to help create this.


I made sure to also make duplicates in case anything went wrong.


Here, I made the "cape" cloth for the statue, by making a thin cylinder shape with many subdivisions applied to the height and caps.


I then made a small hole for the head for the statue to slip through, and added nCloth and Gravity (which can be found in the FX tools) to the circular cloth.

I also made sure to add the Passive Collider (which can also be found in the FX tools) to the rest of the body, so that the cloth would have a force to mould against. Once that was done, I animated the cloth to go over the statue, making sure it would sit right around it and flow naturally.


After all this, I applied the nessessary textures I made before and combined the pieces of the statue together. Using the UV Planar, again, to make sure the textures fit right on the model.


The texture I made in Photoshop for the cloth can be found below.


Here is the fully rendered version of my 3D Statue Model.


Gem and Mask Models

My next step for my statue was to create the Gem and Mask that would be accompanying it. I made the gem simply by extruding and reshaping a sphere, and using the Append to Polygon tool to fill in any gaps. I then used the texture I made in Photoshop for the texture itself to give off a marble like look.


Here is the fully rendered model.


Doing the mask was a similar technique, though I based it off using an duplicated face from my previous 3D model of the body. I then shaped it to resemble the mask I wanted and used a golden texture I made in Photoshop.


Here is the finished model.


3D Statue and Pillar


 For our 3D Art Production assignment, we were set to make a model in Maya, add additional animations all into Unity based with our old battle arena project that would be remodelled.
I started of wondering what kind of statue I wanted in the first place, taking various inspirations from different medias and making a "mock up" of what I wanted to finish. Some of the inspirations included marble models, video games and comic books, as well as fashion designs.


I then modelled what I would have liked to have had in the end with a drawn perspective of the front, back and side of the statue.


Next, using what I had learnt before similar to the pillar construct, I made a pillar to go with the statue. First taking a reference, and modelling after the likeness of it. I also made a marble texture on Photoshop to accompany the pillar.


I used the UV Planar tool technique to help me map out the texture on the pillar.


Here is what it looks like fully rendered.


Shiny Master Sword - The Legend Of Zelda