Wednesday, 30 March 2016

Gold Texture

For the mask of my statue for my 3D Art Production course, I made a golden texture to use in Maya.

Using black and gold palettes, I rendered the colours in cloud. 


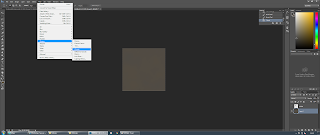
I then went to the filter gallery, into sprayed strokes and using the length and radius shown there.


I then went back into the filter gallery and under distort I used the glass filter. Using the settings shown, it gave me my end result which I'm quite happy about.


Tuesday, 29 March 2016

Glitch Effect

As part of my Spring group project, I was set to make the End/Game Over scene. As prior to our theme (a simulation) I thought it was fitting to add a glitch corrupted scene to fit the game. I first set myself up to create a moodboard.


The regular occurance of most of these Game Over screens show very bold and often than not blurred images, full of lines of codes that fill the page. I wanted to mirror this effect. I then set myself out to research how I could do this on Unity and came across this tutorial that provided me with the help and code I needed.


The coding involved using the cameras and depending on the layers, any images would have to be in Depth Only mode. The code also had to have the line using UnityStandardAssets.ImageEffects; to work, as well as importing effects from the Asset tab at the top.


The intensity of the glitch can also be easily adjusted. However, there is a possibility where the entire scene can break, and appear to have missing scripts and codes. In this instance, clicking the Reimport All in the Asset tab may fix this error. For this end scene, I provided a few backgrounds to suffice the scene, as well as premade fonts and audio to accompany the "error".


Tuesday, 15 March 2016

Insectoid Character

 For this brief, I had to design an character that is insect inspired. And so firstly, I created a moodboard that helped me visualize my idea, before sketching out a few designs in my book. However, the main part of this brief was also not to make it appear too antho-like. For example, an insect on a human body would not suffice my design brief. I took a look at a few games, artist sketches and other media works in films as well.

 
Before any sketches, I did a bit of research on insect parts to get a better feel of what I could do. For most of it, what I recognised is that most have quite similar eyes/eye shape. Though dynamic as they come. 

After that, I went on thinking what kind of character I could make. Something regal or common, or something aggressive and dangerous? I wanted to create something based on their shapes and nature. What I go out of it all was that the insects I studied had certain aspects of themselves that appeared either deadly or defensive. I wanted to make something that was borderline both, and began narrowing down my sketches, combining some aspects.


In the end, I wanted to create a character that was plainly obvious as an insect, with an air of mystery and having something quite sinister looking about them. Having multiple eyes makes them appear to have an adept vision, and multiple small feelers also give that effect of heighten senses.
I also added a small summary describing my character which reads;

This creature preys on those that are barely surviving, guiding them back to their nest by luring them wit empty promises. The Tattered cloth it wears is said to 'apparently' have the ability to transform into misshapen wings. The oversized scythe it carries along with it is rumoured to have come from something that was insanely monstrous, but thankfully extinct.

 Above is a grey-scaled blueprint view of my character from the front, back and side. This was done in Photoshop.


A final rendering image of my character also done in Photoshop with colour. After some review, I realise the front, back and side views should have been aligned more correctly to their anatomy, as well as anatomy of the insect is needed without the cloak as well, for future reference to someone that would have modelled it.

Friday, 11 March 2016

Life Drawing 18

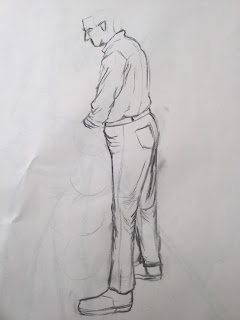
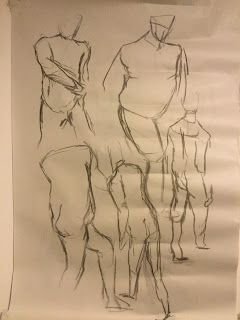
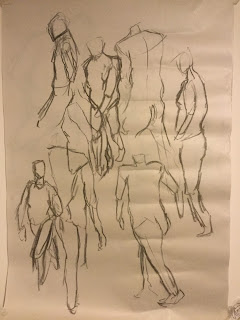
For this last life drawing lesson, our model had clothing on instead. I found it to be wildly contrasting to the usual naked model we had, as the clothing has plenty more lines and flow than the body. It also made the body appear more in shapes to me, and a little unnatural. We started off with a few simple sketches.

They then held a few poses with some props, including a broom, a large stick and even sitting down for about 15 minutes. For this I began to see how difficult it can get adding clothing on, as it throws off the measurements of the entire body for me.


We finished off with more short sketches, with our model in a robe and also without a shirt to see the difference. I feel with time, I could get better at doing this, but it was an interesting challenge.


Tuesday, 8 March 2016

Asteroid Models

For my group project (Cuppa Team), I worked on modeling the Asteroids that would feature in the game. Firstly, I created a Moodboard in research for this.


I designed the texture in Photoshop by selecting two dark colours. I then went to the filter window > Render > Clouds so that the two colours blended together in the background.


After that, I then added noise (also found in the filter window) by 1%. This makes the image appear grainy. I then switched to the Alpha Channels.


There, I added another layer before Rendering > Difference Clouds for around three times until the image appears dispersed and not so closely knit. I then once again added noise by 1%.


In the Edit window, I clicked on the Faded Add Noise with 50% opacity so the strength of the image was lessened to blend better.


Going back to the layers, I rendered with lighting effects and toggled with the lighting so that there was a delicate balence of light and dark on the image. I also made sure the texture was at Alpha 1 with a height of 5.


I finished this off with simply modeling a regular Asteroid that started out as a cube polygon, shaped it slightly before adding on this texture in a new lambert. At the bottom is the fully rendered texture that I made. 


I went on the making several Asteroids as a test run. All varying in shapes and size.


Life Drawing 18

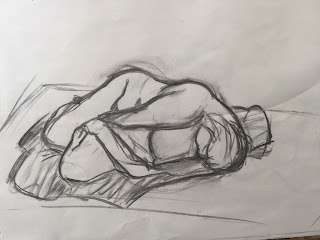
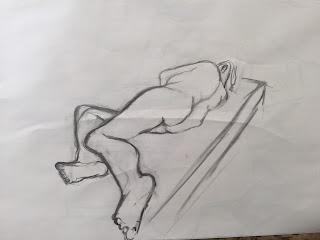
In this lesson, we worked on the initial practice sketches. Each being a good three minutes or so, before turning the model into a silhouette by drawing what appeared on the outside of the model so they were left blank. Perceptive and negative spacing became useful after the two drawings lasted fifteen minutes.


 After this, we worked on foreshadowing again, drawing the model for fifteen minutes and working out the body changes in distance from myself. Despite the body proportion being seemingly abnormal, it works in this perspective, and I found it quite enjoyable when it came to the end result.


Life Drawing 17

During this session, we practice more on perspective again using four squares around the model that had a cross grid on them, acting as guidelines for each pose.


Several more practice sketches were also done, all were for a brief three minutes in each pose.


We then practiced sketching the model very quickly in motion. I found this the hardest to focus on however.


The next few drawings were done for a good ten to fifteen minutes, focusing purely on the pose.


Shiny Master Sword - The Legend Of Zelda